Wednesday, April 18, 2012

New to Photoshop Elements? Make a layout now!


I'm often asked by new digi-scrappers how to get started in Photoshop Elements.  I hope this quick tutorial helps!
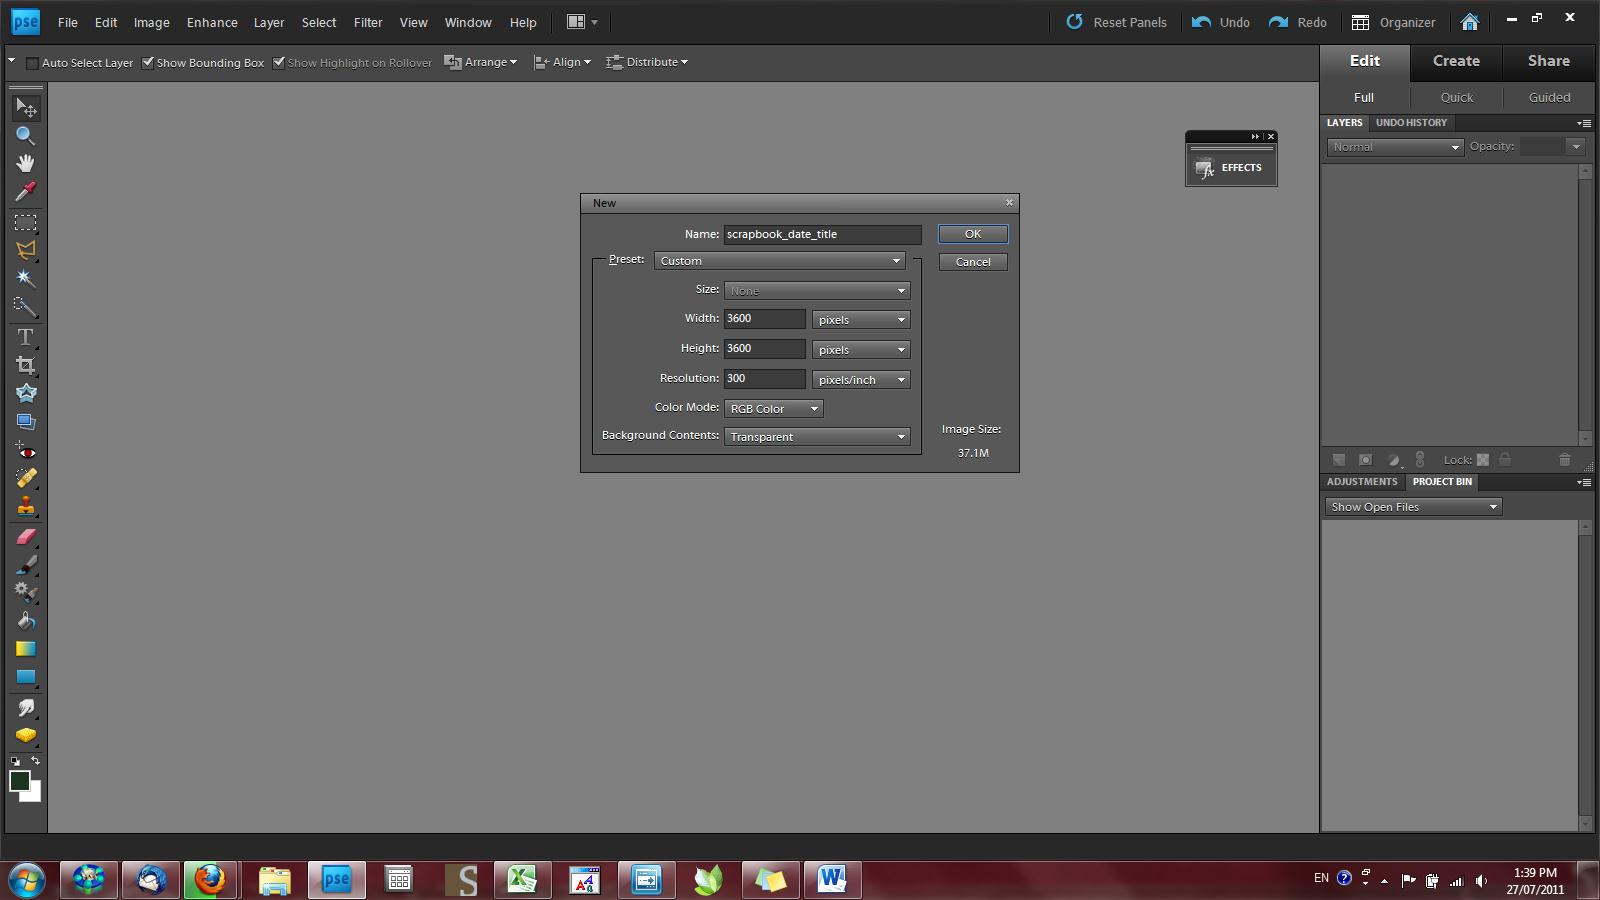
Open a new file.

Choose settings of 3600x3600 pixels for a 300 dpi page, or 2400x2400 for a 200dpi page.  This is your choice based on which products you purchase.  Print quality is 240dpi, but most people don’t notice any degradation in quality using 200 dpi products.  For 200dpi file sizes are much smaller so if hard drive space is an issue you may want to go that route. I always name my files as scrapbook_date_title so that they are easy to find and sort by chronological order. I use the date of the photo, not the current date as that is already stored in the computer when you save. Click OK.

Press Ctrl+O or File>Open and browse to the page kit you want to use.  
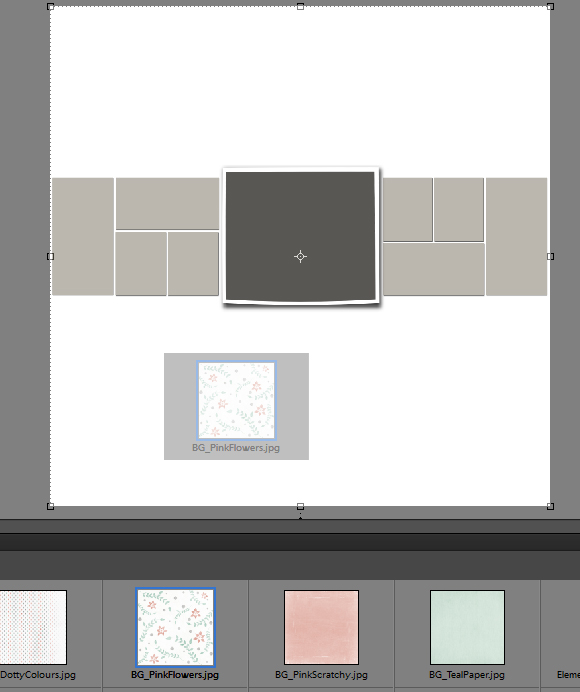
Open the BGs and Elements. These are the graphics of the kit.  Also open the photos you want to use.  You will see all of these items in your project bin, usually at the bottom of your page.

Drag your kit pieces into your empty file from the project bin.  Some people will copy and paste them, but if you drag them in, you retain the file names and that’s helpful when writing your credits.  Everything you drag in will show in your layers palette on the side of your screen.  Think of the layers as all of the layers in a paper scrapbook page.  They show from the top to the bottom.

If you want to resize or rotate an item, make sure you have your move tool selected.  It’s the top one in the column at the left.  The handles of the element make it easy to rotate or resize.  Try not to use the side handles, only the corner ones to avoid distorting things.


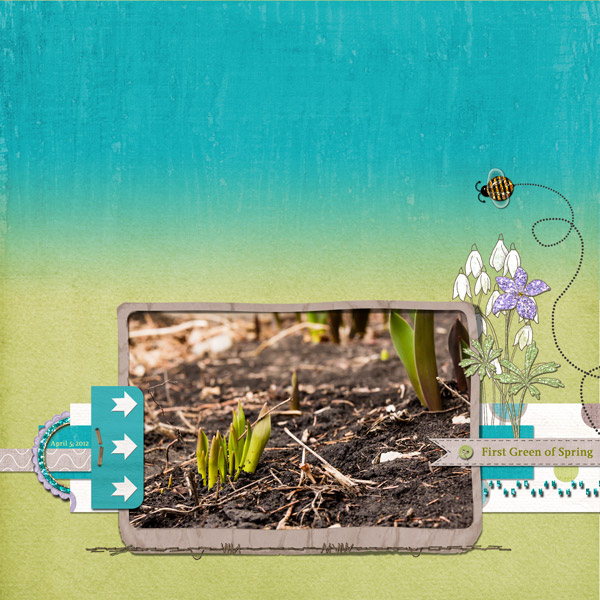
Add text with the text tool.  PSE uses all of the fonts installed on your computer. 

Save as a jpg for printing and as a psd for future edits.  I hope that helps!

Using Layer Thumbnails for Selections

Sometimes in digital scrapbooking we want to do something that would be so easy with paper but we don't really know how to get the right look digitally.  One of the ways that we can create certain effects is to use layer masks to selectively hide parts of layers, allowing lower layers to show through.  That is just what I did in this layout to have the T. Rex. stepping through the frame.
Tyrant Lizard King (Royal Harvest value collection by Erica Belton)
For me, one of the tricks of making layer masks work for you and not against you is to use the layer thumbnails to make selections for you. We do this by pressing Ctrl while clicking on the thumbnail of a layer to create a selection of all of the pixels over 50% in opacity.  With this layout, I used this technique to hide part of the dinosaur that we want to be behind the frame.  Here's what I did:
First, I created the basic layer structure of my layout.  This ended up changing by the time I was done the layout, but for now it works.  (I used Topaz ReMask to create my extracted dinosaur layer and then duplicated that layer, placing one over and one under the frame.)  Then I added a layer mask to the topmost layer.


Then, I pressed Ctrl while clicking on the thumbnail of the frame.  You can see from the layout that the frame is selected with the marching ants while I still have the layer mask active in the layers palette.  
Finally, I painted with black on the layer mask to hide the parts of the dinosaur that were to be behind the frame.  Because I have an active selection, my painting only affects the areas within the selection.  This gives me a very accurate line compared to free-handing the brush. 

Now it appears that the dinosaur is stepping through the frame.  


I hope that this technique will help you to create more realistic interaction of elements on the page.  You can use it to wrap ribbons, flourishes and leaves around other elements more quickly and accurately.  Here are a couple of other layouts where I used this technique.
Kindergarten 1979 (Peaches and Sage Add-on Pack by Erica Belton)

 I added a layer mask to the frame and selected the photo.


First Green of Spring (Glitter Me Spring 2 by Erica Belton)
 I added a layer mask to the circle frame and selected the paper strips one at time.


Silk Dyed Eggs (Tasty Tangelo Value Collection by Erica Belton)
I added a layer mask to the string and selected the punched paper.


I would love to know if this technique adds to your layouts!

Sunday, April 8, 2012

Putting the Quick back in Quick Clicks

I've heard it over and over that quick clicks (or layered templates) just aren't quick.  For some people, it's because they just can't decide on a paper combination. For others it's more about making the software work better for them.  Here's the good news: there is a shortcut to make it faster! 


The method I'm going to share with you works best on layered templates with shadows on separate layers.  Some templates don't have the shadows on separate layers so you might get imperfect results with this method, but I'll give you a tip on those another time.


The first step to making layered templates, like the one below, work for you is to open the .psd file in Photoshop Elements.


 You can see from this screenshot of my layers palette that this quick click has 20 layers.  Almost half of them are shadows!


Now, here is the first big trick to working quickly with quick clicks: turn on auto-select.  To do this, select the move tool (press V) and make sure the first box is checked on. This will allow you to click on the layout itself to select a layer.

 Now, working from the back forwards, select the background layer and drag your chosen background paper onto the layout.

Now select one of the blocks and drag another paper onto the layout.


Now your layout should look something like this:


Here is the magic step.  On your keyboard, press Ctrl+G.  This will 'clip' the paper into the shape below and you will see that magically most of the paper has disappeared.  It's not really gone, but only the part over the layer below is now showing!  Cool, isn't it? 

On your layers palette, you'll see this:

What this shows is that the BG layer is clipped to the Block layer below it.  The whole of the BG layer is there, but most is hidden. You could even make that layer bigger or smaller to show more or less of a pattern if you liked, or shift it to show a different part. Just use the move tool (V) to do that.


Now, continue adding papers and photos and clipping them to the template below using the move tool and Ctrl+G.  In just a few minutes, you should have a layout ready to embellish!  Here is my finished layout with this quick click.
One on Blocks Quick Click by Erica Belton and Feeling Free 2 page kit by Erica Belton

Friday, April 6, 2012

The Art of The Scraplift - Gradient Background

Welcome to Perfectly Planned Pixels.


I wanted to start this blog for my friends who are digital scrapbookers to help them learn how to do some of the things that I do on my pages.  If there is every something you see that you just want to know how to do, please let me know.


I plan to show most of my techniques in Photoshop Elements 9 as I believe that is one of the most easily accessible programs available for digital scrapbooking.  It allows for highly creative pages and anyone with a higher version of Photoshop Elements or Photoshop CS will be able to use these techniques. Photoshop Elements is available from the Adobe website as a 30 day trial if you want to give it a test drive.


With my explanations, I assume you have a working knowledge of PSE and layers.


I also occasionally scrap with CM Storybook Creator 4.0 so if you want to see some ideas on recreating the techniques in that software, please let me know!


To start this blog, I want to keep the technique simple.  Let's look at creating a blended background like the one in this layout, First Green of Spring, that I created last night. This layout uses Glitter Me Spring 2 page kit by Erica Belton.


The blended background here makes use of layer masks.  What is a layer mask, you ask?  A layer mask is a way to digitally cut out your graphics.  Let's see what this one looks like at the complete stage:


You can see from this screen shot of my layers palette that the BG_VibrantTeal has a second thumbnail beside it.  That is the layer mask. Basically, a mask works by hiding with black and showing with white.


To create a layer mask, select the layer you want to mask and then click the small rectangle with a circle button at the bottom of your layers palette (second from left in PSE9).  That will add the second thumbnail to the layer.  Then you can 'paint' with black and white and all the grays in between to creatively hide parts of the layer.  I use layer masks all the time for 'threading' elements together.  I'll show that in a future post.


So back to our blended background...place your two backgrounds one on top of the other and add a layer mask to the top one.


Now, click on the mask and then select the gradient tool (or just press G).  Make sure your gradient tool is set to the settings here.  If yours shows white to black, check the reverse box.


Now, on your layout, draw a line straight up from about the middle of your layout to about 1/4 from the top.


Now you should have a nicely blended background for your layout!


Use this technique creatively by changing up the options on your gradient tool bar.  Remember that you are working digitally so if you don't like what it looks like, just undo!