
I wanted to start this blog for my friends who are digital scrapbookers to help them learn how to do some of the things that I do on my pages. If there is every something you see that you just want to know how to do, please let me know.
I plan to show most of my techniques in Photoshop Elements 9 as I believe that is one of the most easily accessible programs available for digital scrapbooking. It allows for highly creative pages and anyone with a higher version of Photoshop Elements or Photoshop CS will be able to use these techniques. Photoshop Elements is available from the Adobe website as a 30 day trial if you want to give it a test drive.
With my explanations, I assume you have a working knowledge of PSE and layers.
I also occasionally scrap with CM Storybook Creator 4.0 so if you want to see some ideas on recreating the techniques in that software, please let me know!
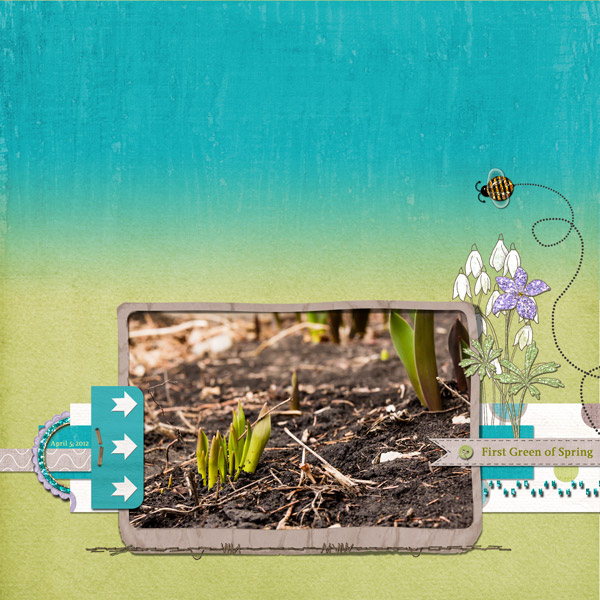
To start this blog, I want to keep the technique simple. Let's look at creating a blended background like the one in this layout, First Green of Spring, that I created last night. This layout uses Glitter Me Spring 2 page kit by Erica Belton.

The blended background here makes use of layer masks. What is a layer mask, you ask? A layer mask is a way to digitally cut out your graphics. Let's see what this one looks like at the complete stage:

You can see from this screen shot of my layers palette that the BG_VibrantTeal has a second thumbnail beside it. That is the layer mask. Basically, a mask works by hiding with black and showing with white.
To create a layer mask, select the layer you want to mask and then click the small rectangle with a circle button at the bottom of your layers palette (second from left in PSE9). That will add the second thumbnail to the layer. Then you can 'paint' with black and white and all the grays in between to creatively hide parts of the layer. I use layer masks all the time for 'threading' elements together. I'll show that in a future post.
So back to our blended background...place your two backgrounds one on top of the other and add a layer mask to the top one.

Now, click on the mask and then select the gradient tool (or just press G). Make sure your gradient tool is set to the settings here. If yours shows white to black, check the reverse box.

Now, on your layout, draw a line straight up from about the middle of your layout to about 1/4 from the top.

Now you should have a nicely blended background for your layout!
Use this technique creatively by changing up the options on your gradient tool bar. Remember that you are working digitally so if you don't like what it looks like, just undo!
Addie, I love this. I'm photoshop challenged and you explained this so well even I understand it :) Thanks!!!
ReplyDeleteThanks Gail! I'm so glad that it made sense!
DeleteThis is great Addie! Your explanation and steps are awesome! :)
ReplyDeleteThanks Heidi!
DeleteLove the design of your blog as well as the page in your example!
ReplyDeleteThanks Tracy!
Delete